Configuring Stripe Checkout
Attention:
Stripe Checkout requires the Pro version of the shop extension!
Preparation
In order to use Stripe Checkout you need the following:
- an active Stripe account
- a composer-based installation of TYPO3
Stripe API access credentials
- On the Stripe login page, switch to the Developer -> API key area (https://dashboard.stripe.com/developers)
- Create new API credentials
- A public and a secret key will be displayed
- These keys must be stored in TYPO3 using TypoScript constants
- Create an endpoint secret to be able to listen to stripe events (https://dashboard.stripe.com/webhooks/create) (see chapter "Events" for more information)
- Save the endpoint secret in the
singlePaymentIntentSucceededEndpointSecretTypoScript constant
Events
Payment Intent Succeeded Event
You need to configure an event listener for the payment_intent.succeeded event so that your Stripe checkout knows when a payment has arrived via Stripe. The setup is done in 2 steps.
- setup of the webhook page
- configuration of the webhook in the Stripe dashboard
Setup of the webhook page
The stripe callback should call the stripeCallbackAction in the BackendOrderController. For the simplicity of the setup a short url can be configured
  ShopCheckoutPlugin:
    type: Extbase
    limitToPages:
      - {uid of the page with the basket order plugin}
    extension: Shop
    plugin: BasketOrder
    routes:
      - routePath: '/stripe-callback'
        _controller: 'BasketOrder::stripeCallback'
Configuration of the webhook in the Stripe dashboard
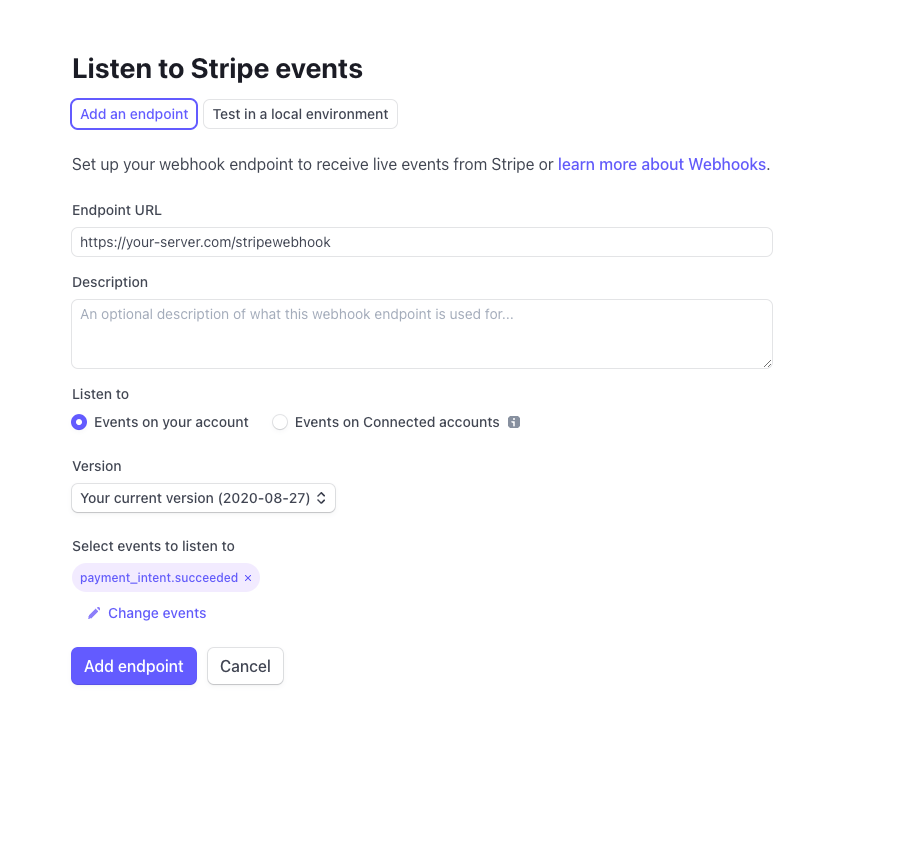
- Go to the https://dashboard.stripe.com/webhooks page and click Add Endpoint.
- Enter the URL of the page that was set up in step "Setup of the webhook page".
- Select "Select Events" and select
payment_intent.succeeded. - click "Add Endpoint".
- click on the newly created webhook entry and copy the endpoint secret for signature.
- paste the key into the
singlePaymentIntentSucceededEndpointSecretTypoScript constant

To test the webhook in a local development environment, the Stripe cli tool can be used. You can find more information here: https://stripe.com/docs/webhooks/quickstart#download
Add additional actions after a successful payment
If you need actions to be carried out after successful payment, use the StripePaid event listener.
- Create a new slot:
<?php namespace YourVendor\YourExtension\EventListener; use CodingMs\ShopPro\Event\BasketOrder\StripePaidEvent; class DoSomeThingEventListener { public function __invoke(StripePaidEvent $event): void { /* Do something */ } } - Then register the event listener in
Configuration/Services.yaml:services: YourVendor\YourExtension\EventListener\DoSomeThingEventListener: tags: - name: event.listener identifier: 'myListener' event: CodingMs\ShopPro\Event\BasketOrder\StripePaidEvent
Testing
See: https://stripe.com/docs/testing
Test credit card
In order to simulate/test the card payment flow from end user perspective use the following card details:
Credit card number: 4242 4242 4242 4242 CVV: 123 Exp: 12/25 (Or any other valid date in the future)
Error handling and messages
The Stripe checkout uses the FlashMessage.push() JavaScript method for pushing messages. For this service you need to define a div container as wrapper for the messages, for example <div id="shop-flash-messages"></div>.
Calling the webhook ends in a 404 error
Calling the webhook results a:
Page Not Found
Reason: Request parameters could not be validated (&cHash empty)
Solution 1.
Open the Installtool and disable pageNotFoundOnCHashError setting: [FE][pageNotFoundOnCHashError] = false
Solution 2.
Exclude the parameters of the request like this (LocalConfigration/settings.php):
'FE' => [
    'cacheHash' => [
        'enforceValidation' => true,
        'excludedParameters' => [
            'payment_intent',
            'payment_intent_client_secret',
            'redirect_status',
        ],
    ],
],